Create or Edit Existing Sales Order Import Template

Acctivate offers a built-in utility which allows users to import sales orders from text files (like Excel spreadsheets) or an Access database. The sales order import utility is designed to dramatically speed up the process of creating orders in Acctivate which were originally placed outside of Acctivate.
This page covers creation of a new or modifying an existing import using a text file source. We recommend using a CSV file type but there are other flat file options. This process most commonly uses one file but can have up to three source files. You can download templates from this zip file to see the difference between using one or multiple source files to create orders. View a full list of fields available for this import here.
If a template is already setup, check out this training page Import Sales Quotes and Orders for instructions on daily use. Go here for steps on how to sync webstore orders or process EDI transactions.

Create New or Edit Existing Sales Order Template
- File > Import Sales Orders or click Import Orders icon from the icon bar.
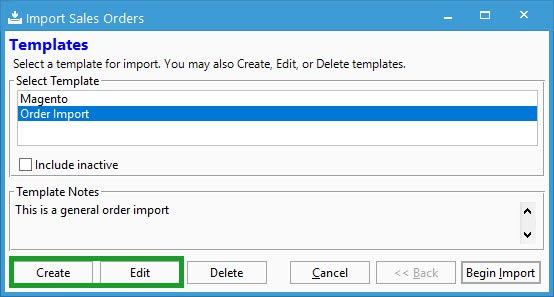
- Click Create or select the Template to modify > Edit.
- Select the correct Source File(s).
- For flat files, choose Type of Text and how it should be parsed. The most common option is delimited. CSV files use a comma while some TXT files use tab as a delimiter.
- Toggle the option for 1st Row Field Names option based on whether your file has column headers in the top row. If no column headers, each column will be assigned a number starting at 0 for column A, 1 for column B, etc. It’s good practice to open a copy of the file used for import to add a header row of numbers to make the mapping process easier. You’ll see this in the preview window in step 5 when option not checked.
- When using multiple files, make sure to include Order Number on each row within the files to relate the details back to the proper record. Column headers need to be unique in each file, therefore distinguish the order number column header in some way (order number details, order number header, etc.). Make sure no other duplicate headers exist before import.
- Click Next to and choose Options for import.
- The Preview window shows the information in the file, as well as the user the ability to modify data on the fly before import.
- Click Next.
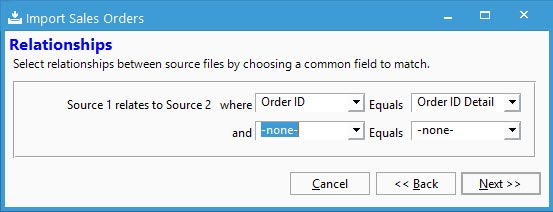
- When using multiple source files, the Relationships window is the next step. This is where you specify which columns in the sheets tie the data together. Typically, you’ll have order number on each row in both files to relate the details to the header information. After relating the proper columns in each file, click Next.

- The Mapping window opens next which allows you to select the columns to be imported into Acctivate fields. Expand each section to map all necessary data for your import.
- Order Detail: Product details for the sales quote or order. Typically, the mapped fields are product ID, quantity ordered, and price. Feel free to use any available data point, including custom fields setup on the order detail lines in Acctivate.
- Order Detail Lot/Serial: Assign lot or serial numbers to the products listed on the sales order. Make sure the product ID and sales order number is on each row showing a new lot/serial number. Only map fields here when needing to assign a lot or serial number.
- Order Header: Set the order number, order date, shipping address, customer, and any other header fields available for import. When needing to distinguish between quote and order, set the Order Status and Order Type as a default or mapped to field(s) in the file.
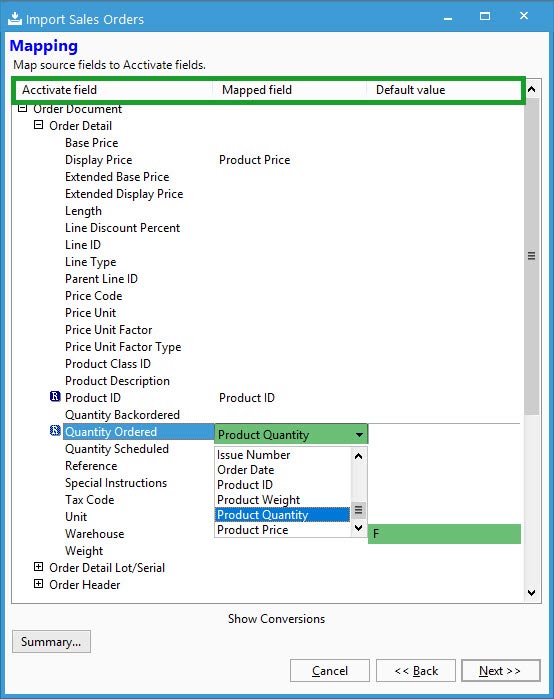
- For each Acctivate field you’re importing into, click in the Mapped field column to select the appropriate column. Use the Default Value to assign a value for all orders when there is no value in the column or in the sheet at all. Users can also setup data conversions on each mapped field to convert a value like “Ready to Fulfill” to “Scheduled” as the order status by clicking in the appropriate field and choosing Show Conversions. In the screen shot below, I mapped Quantity Ordered in Acctivate to the column named Product Quantity in the file. All of these orders flow through one warehouse so the Warehouse is set to default to the F warehouse in Acctivate.

- Once all necessary fields are mapped, click Next. If you wish to close and save without importing, click Cancel and then Yes to saving import template.
- If option to provide confirmation before importing sales orders is checked, click Validate Orders. Otherwise, select Import Orders.
- Validate Orders adds a step to the import where the data is validated prior to import. The user will be shown any warnings or errors found to resolve before completing the process. Once validated, click Next to be able to Complete Import.
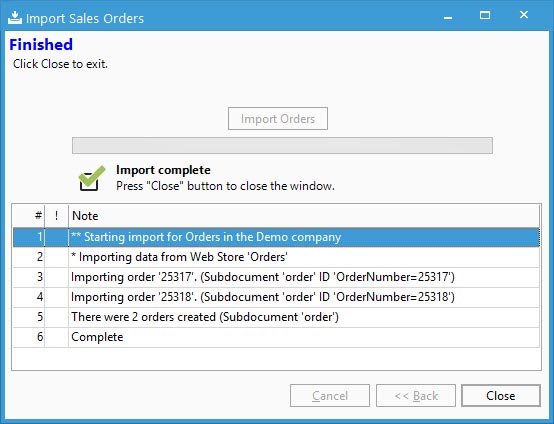
- Import Complete will show on screen when finished with the list of orders created. Any unresolved warnings or errors will be listed to review.
- Close when done.


