Enter Customer Payments


Acctivate allows users to create customer payments related to individual Sales Orders, Invoices, as well as bulk payments to be applied to multiple invoices. This includes the ability to process credit cards and pre-authorize prior to invoicing when utilizing one of our credit card processor integrations. Make sure to setup all necessary payment methods in QuickBooks prior to entering payments in Acctivate.
The Enter Payment window can be accessed in various ways depending on need.
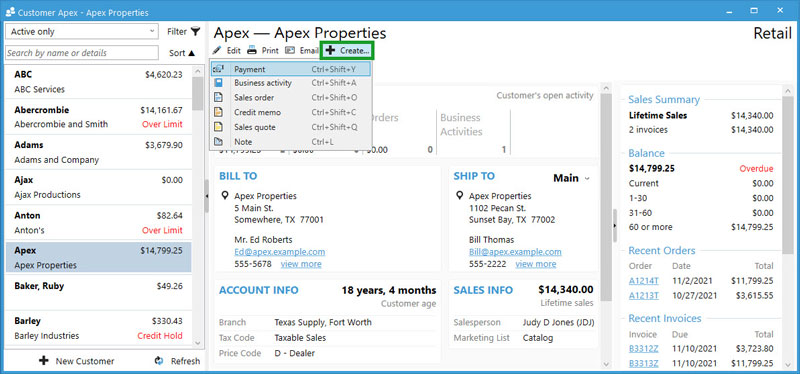
- Customers Record: Enter payments received after invoicing with customer already selected when payment window opens.
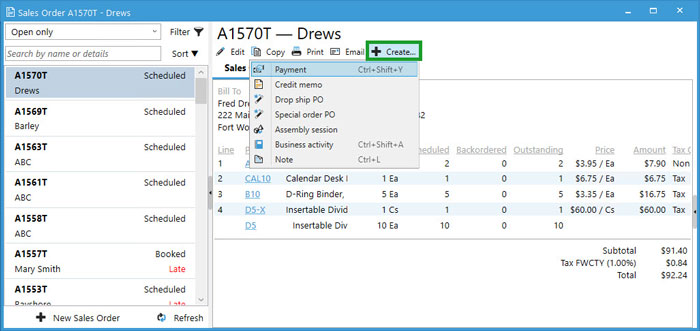
- Sales Order: Create and apply customer deposits on orders as unapplied customer payments.
- Enter Payments Window: Entering payments received after invoicing without customer selected upon opening window.
Create Payment from Customer Record
- Open the Customers list from the left navigation menu or the Edit Customer window from the icon bar.
- Search for and select Customer.
- Click + Create > Payment.

Create Prepayment from Sales Order
This creates a general customer payment record with the order number listed in the memo. When creating the invoice, the user will be able to apply to the invoice balance via the Credits button on the Create Invoice windows. This step can also be taken by editing the created payment on the Enter Payment window and applying the balance to open invoices after release.
- Open the Sales list from the left navigation menu or the Edit Sales Order window from the Sales menu / icon bar.
- Search for and select an order.
- Click + Create > Payment.
- Payment Memo defaults to Prepayment for Order {OrderNumber}.

Create Payment via Enter Payment Window
- Use the Cust Payment icon on the icon bar or go to Customer > Enter Payment.
- Click New.
- Type the full Customer name and press Tab or use the lookup to search for and select the proper record.

Entering Payment Details
Once the customer is selected on the payment window, users can enter the payment details.
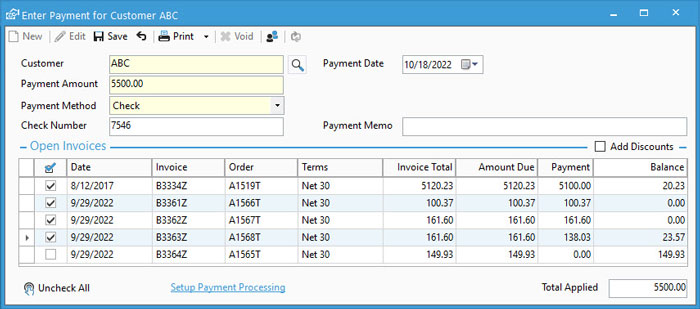
- Select the Payment Date.
- Enter the Payment Amount.
- Select the Payment Method being used. If the customer has a preferred method selected on the Credit tab of their customer record, this information will default based on details set on said record.
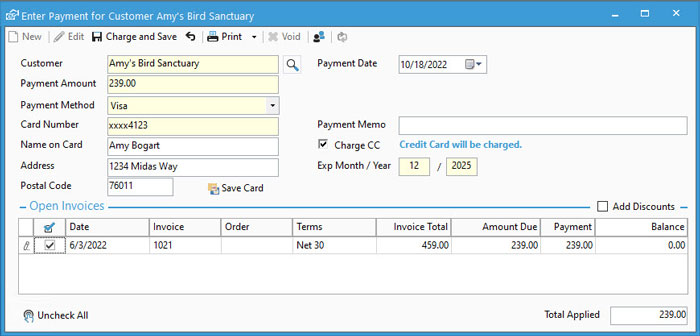
- If necessary, enter a Reference #, Check #, or Credit Card details. When updating Credit Card details on this window, the user has the option to Save Card to the customer record. They’ll receive a prompt asking to set this as the default for the customer, as well as an option to check stating you have the customer’s signed authorization to save the card. Choose Yes or No based on need.
- Add a Payment Memo for future reconciliation purposes, if necessary. This will be prefilled with order number if payment was created from a Sales Order.
- Toggle the AR Account to view Invoices created on specific accounts when using multiple branches. This field is hidden when all invoices for the customer utilize one branch.
- When needing to see or add discounts to invoices, click in the Add Discounts box. Early payment discounts will default, if available. Users can also override the amount to be a custom value.
- Check off all Invoices to apply payment to.
- The user has the option to sort the list of invoices to apply to for auto application purposes by clicking any column header. Acctivate will Auto Apply top to bottom up to the payment amount. If this button is clicked by mistake, choose to Uncheck All at the bottom to reselect.
- Entering a prepayment related to an order will create a general unapplied payment. Generally, there will be no invoices to check off for customer deposits.
- As invoices are selected, the payment and balance columns update accordingly.
- When all data is entered, Save the payment. If this is a credit card payment with an integrated processor, the button will read Charge and Save with an additional check box to Charge CC under the Payment Memo.
- For prepayments, the user will be prompted to verify adding an overpayment as a credit. Click OK if this applies to you.


