Processing EDI Transactions

In this article

Full training library
Acctivate supports omnichannel order fulfillment including the ability to send and receive EDI transaction files for Sales (850 Customer PO, 856 ASN, 810 Invoice) and Third-Party Warehousing (940 WH Shipping Order / 945 WH Shipping Advice).
Once configured, opening the Process EDI window prompts Acctivate to check both the incoming file paths (exported from the EDI Provider) and any new outgoing files needing to be sent back to the trading partners. Users can choose to send and receive all or specific documents based on selections within the tool. A resubmit option also exists for documents created within Acctivate.

Process New EDI Transaction Files
- Go to EDI > Process EDI or click Process EDI on the Icon Bar.
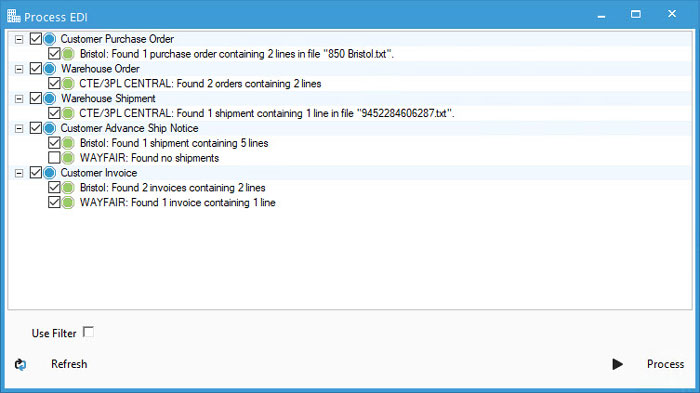
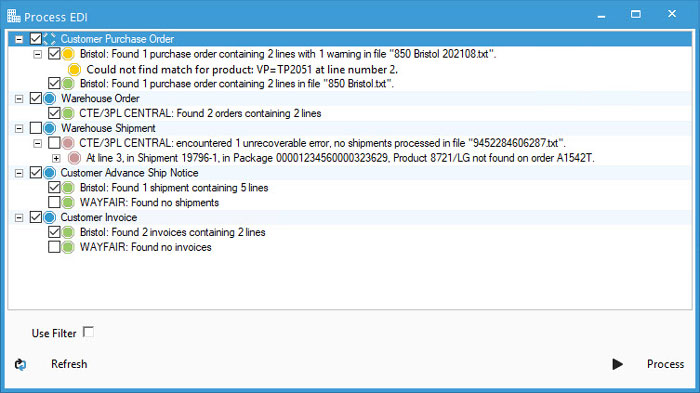
- The Process EDI window opens with all documents selected to process. If any warnings or errors received, expand the row to see the full message to correct any issues.
- Any rows with green dots are ready to process without issue.
- Rows with yellow dots have warnings which need to be verified. These will still be processed.
- A common warning is products listed on the 850 which cannot be found in the database. Either update an existing or create a new product based on said warning. If nothing is fixed, the order will import with N lines for any product not found in the database.
- Red dots mean there are errors in the file to be resolved. These will be blocked from processing.
- Uncheck documents to de-select from processing or make any necessary changes based on warnings/errors received.
- If changes were made to the files or within Acctivate, click Refresh at the bottom left corner to recheck the files.
- Click Process to send/receive the selected files.
- The user will see Acctivate process each file with result information. These can be saved as a txt file when clicking Save Results.
- Close window when finished or run through the process again by clicking Refresh.

Use Filter to Send New or Resubmit EDI Files
- Open the Process EDI window from the EDI menu or the icon bar.
- Select a specific document type row for one trading partner.
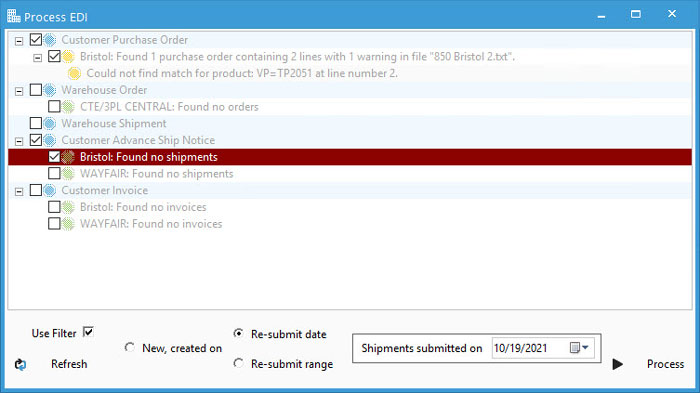
- Toggle Use Filter check box at the bottom of the window.
- Choose from the following options for resubmission:
- New, created on – Select new shipments created on a specific date.
- Re-submit date – Resubmit shipments submitted to the EDI directory on a specific date.
- Re-submit range – Resubmit shipments submitted to the EDI directory between two shipment numbers.
- Proceed with steps 4-6 in the section above.


