Customer List


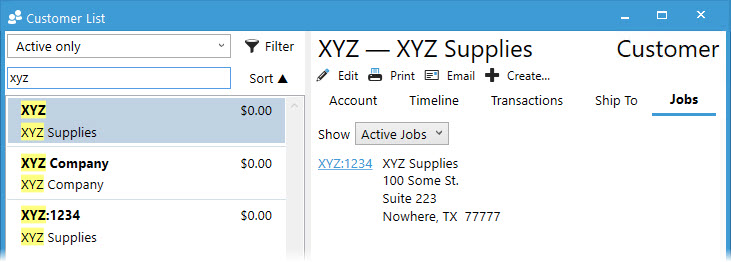
Acctivate shows an easy-to-read list of customers by utilizing the left navigation Customers menu. The default Filter is set to Active only with the option to create customized filters to be saved for future use.
To begin a search, start typing in the Search by name or details field just below the selected filter. The lookup will begin performing a global search based on what you’re typing to give the best match as results.
For each customer shown as a match, the user can quickly see the Customer Name in bold letters with the Balance (and Currency Code when applicable) to the right. If the Customer has an associated Company Name, you’ll see it listed directly below the Customer Name. Customers over their set limit or on credit hold will show the credit status in red below their balance.
Select the customer you wish to review to see more details in the read only window to the right of the list. The Customer Name and Company show above the Edit, Print, Email, and Create buttons. When using Customer Types, you’ll see their type in the top right-hand corner.
- Edit: Opens Edit Customer Window for selected Customer for user to update the information shown.
- Print: Prints the Customer report showing details for the selected customer.
- Email: Creates an email to send from the customer record using the main contact information.
- Create: Menu to create documents, such as a Payment, Business Activity, Sales Order, Credit Memo, Sales Quote, and Note. When using this menu, all documents automatically open with the customer selected and ready to enter details.
The main body of the read-only customer window shows the Account, Timeline, and Transactions tabs, as well as Jobs for when using customer jobs.
On the right-hand side, users can see pertinent information, such as Sales Summary, Balance, Recent Orders, Invoices, and Payments, as well as Unpaid Invoices and Info on creation and updates to the record. The Info section shows the timestamp of creation/update, as well as the user who performed the action. Customers modified in QuickBooks will show QB as the user ID.

Account
This section is comprised of responsive boxes based on each section of the customer account. Across the top, users can extrapolate a Customer Summary of open Invoices, Payments & Credits, Quotes, Orders, Credit Memos, and Business Activities. Below this, the Bill to and Ship to addresses show. Basic contact information is shown with a clickable link to view more when other fields contain data. If multiple ship to addresses exist, click the down arrow next to the default address to show the full list and select an alternate. Creating an order from this customer list window will auto-populate the customer and selected Ship to Location.
The remaining boxes are hidden or shown based on what’s been selected/entered on the Edit Customer window. This includes Account Info, Sales Info, Credit, Preferred Payment, Contracts, Instructions, and Custom Field information.
Timeline
The Timeline shows all linked activities related to the customer. Users filter on specific types of activities by clicking the Type drown down menu. Additional filtering capability exists in the Look for box next to the Type filter. Begin typing some value to search the timeline for specific information. Acctivate will automatically start populating the data as you type.
Available Type Filters
- Business Activities: Any Business Activity with the selected customer listed as a related item
- Charges: Statement charges applied to the customer in QuickBooks, as well as any other miscellaneous transactions effecting customer balance (i.e., general journal entries)
- Credits: Credits Memos created for this customer
- Invoices (Open): Sales Invoices with an unpaid balance
- Invoices (Paid): Sales Invoices with a balance of $0.00
- Notes and Emails: Notes linked to the selected customer window, as well as any Emails sent from the customer window
- Orders: Sales and/or Service Orders related to customer
- Payments: Applied and Unapplied payment records for customer
- Quotes: Sales Quotes related to customer
- Shipments: Information displayed on the Packages tab of a Sales Order. This includes Shipments from Packaging Manager and any integration Shipping Workstation application.
While viewing the Timeline, moving the mouse over each activity prompts certain actions. Hovering over any activity created in Acctivate which has edit capabilities will show the pencil icon where the activity icon appears. For example, clicking this on a Sales Order activity opens the Enter Sales window for the user to modify any necessary details. Anything appearing to be a hyperlink will open the related read only window. When clicking a linked Invoice number, Acctivate opens the related Invoice in a Read Only window for review. The same function exists on all hyperlinked text.

Transactions
To review the full list of open and posted transactions for the customer, check out the Transactions tab. Within this tab, users have 4 buttons to choose from:
- Open: All open sales activity for a customer.
- Orders: All Quotes, Orders, and Credits.
- A/R: Released Invoices, Credit Memos, and Payments with their respective balances.
- Products: A complete list of products purchased by the customer. This includes pre and post migration sales history. If it’s linked to a document in Acctivate, you’ll see the information listed as a hyperlink which opens the related read only window.
To find specific details, type the value you’re searching in the Look for box. This will show the best match to what you’re searching. Users can create custom Filter(s) to use and save like on the left navigation pane, as well as Export what they see to Excel. Additionally, the system admin user(s) can update the Columns shown for each button.
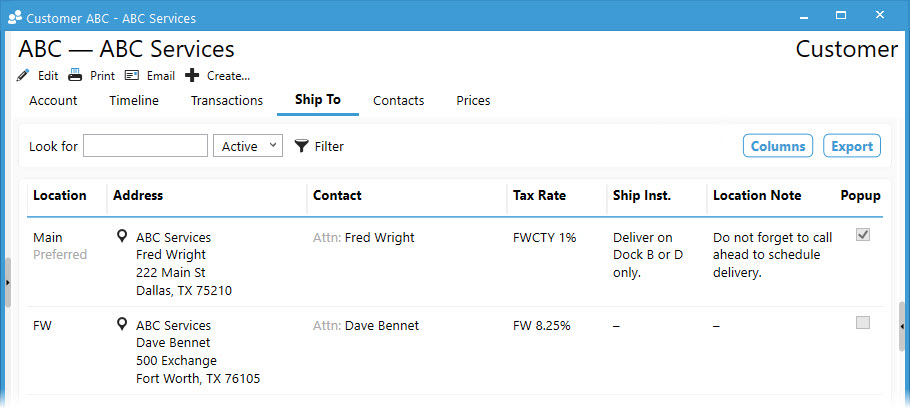
Ship To
See the full list of ship to locations for the selected customer. The Preferred location is shown in the top of the list followed by the remaining sorted alphabetically. System administrators can toggle columns on/off based on need.
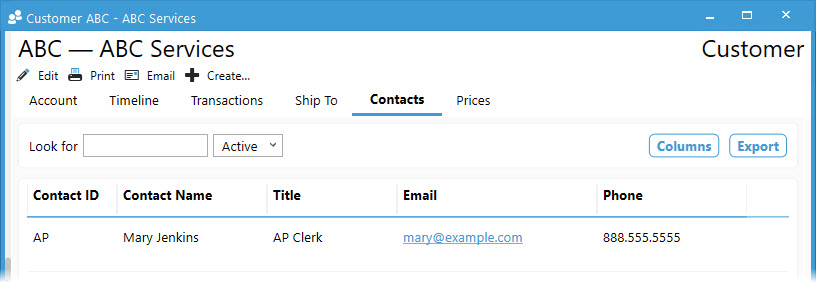
Contacts
This Contacts tab lists the additional contacts created on the Edit Customer window. These are typically different than the main customer contact and can include specific information like title, phone, fax, email, etc. Clicking on a linked email address opens an email window for you to fill in and send.
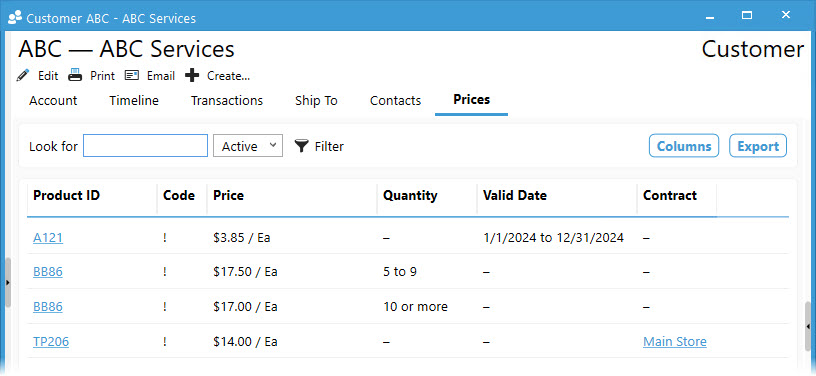
Prices
To review the list of customer specific prices, select the Prices tab. The product ID, price code, price, quantity, and effective/expiration dates show automatically. With system admin privileges, you can add contract and note information.
Jobs
When utilizing customer jobs, you will see the job names for this parent customer, as well as their billing address information. Users can toggle the Show drop down to see Active Jobs, All Jobs, or Inactive Jobs.