Counting Inventory with Acctivate Mobile

With Acctivate Mobile Inventory Management, users can open and post inventory count sessions created on the desktop app without printing huge count sheets. This enables the user to walk the warehouse and scan items as they go rather than writing down the information for someone to enter later. Once posted, the inventory quantities for products listed on the count are adjusting based on quantity entered as an inventory adjustment.
Using this feature requires the count sessions to be created on the desktop app prior to opening on the mobile device. Follow the steps listed here to create a new count sheet stopping at step 6.
With the Blind Count option checked, the previously created count sheet on desktop won’t show products. This requires the user to add each product and quantity counted by scanning the item barcode or adding manually to the sheet.
We have two versions of Acctivate Mobile: Android and Windows Mobile (WM). The steps below cover both versions with the slight variations noted.
Enter Count Quantities on Acctivate Mobile Device
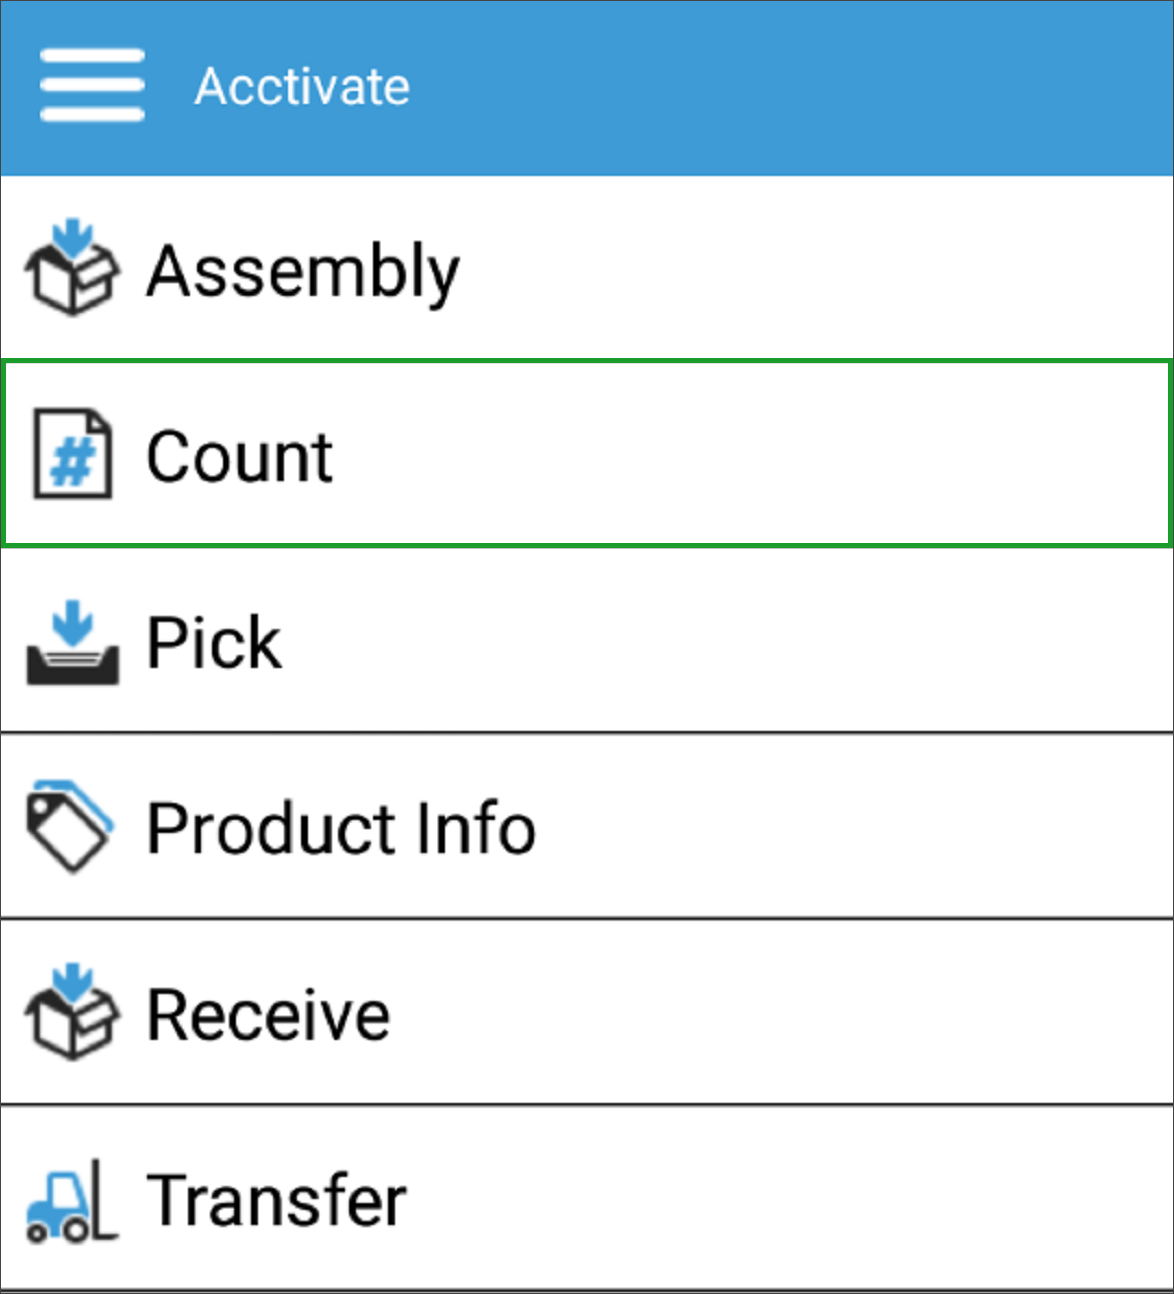
- Login to Acctivate on the device using your normal login to navigate to the Count screen:
- Android: Select Count from main menu.
- Windows Mobile (WM): Click Inventory > Count.
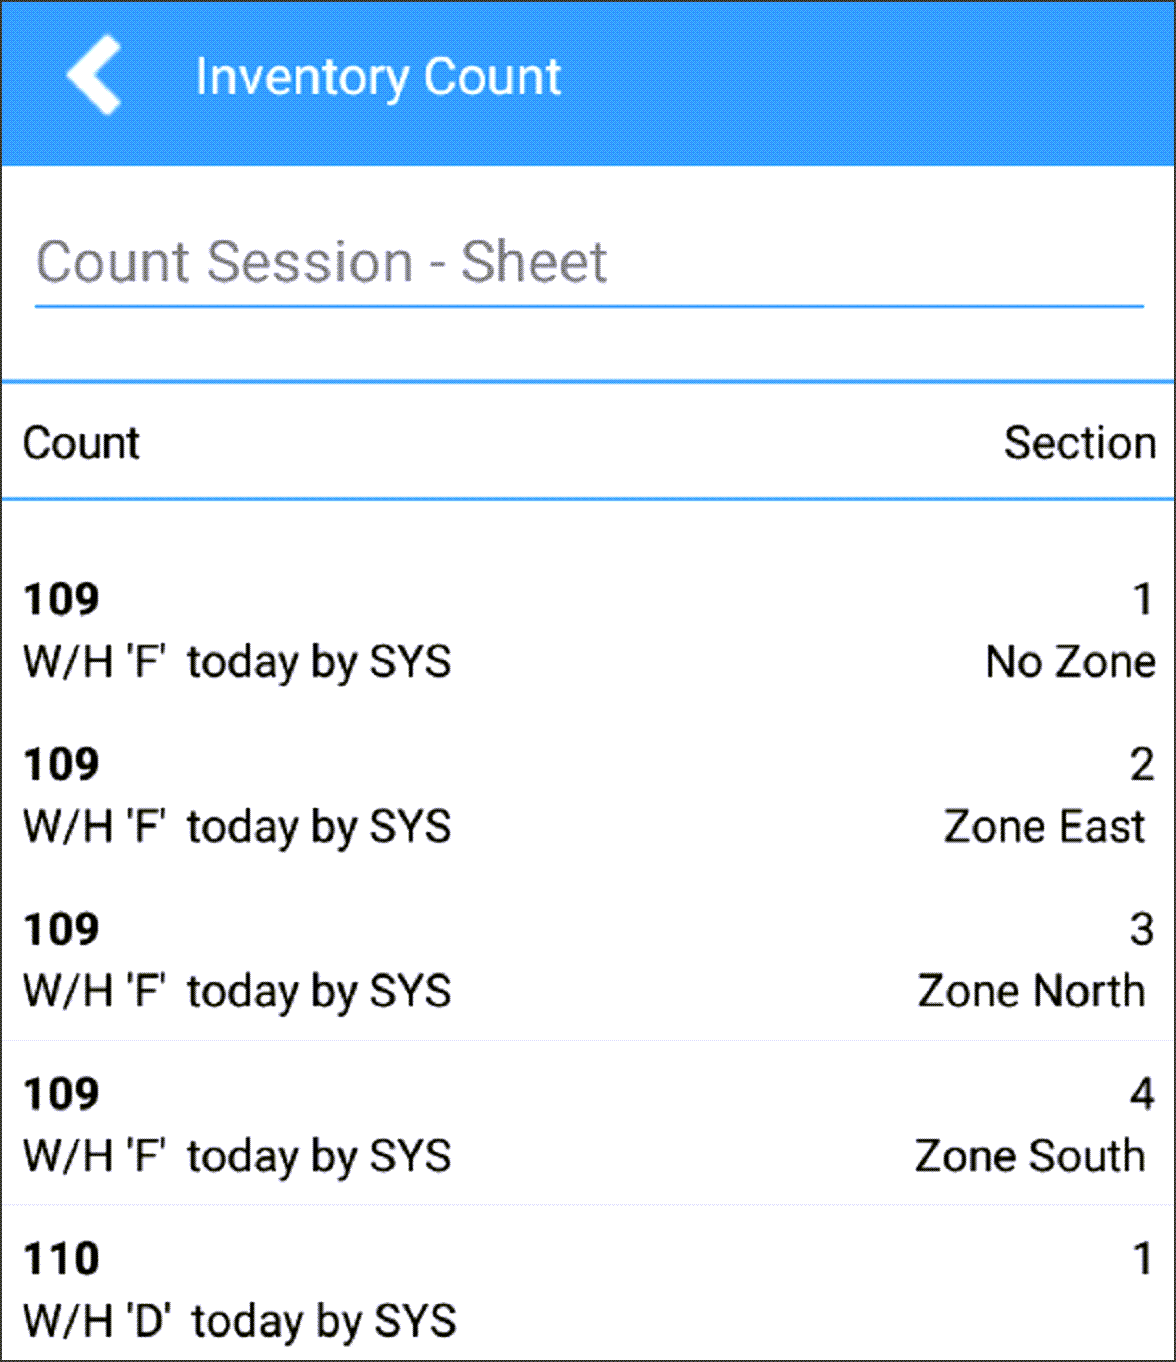
- This opens the Inventory Count screen. Both versions show a Count and Section for you to choose from to open the necessary sheet. Windows Mobile requires you to press the right arrow below the selections to move forward to the next screen.
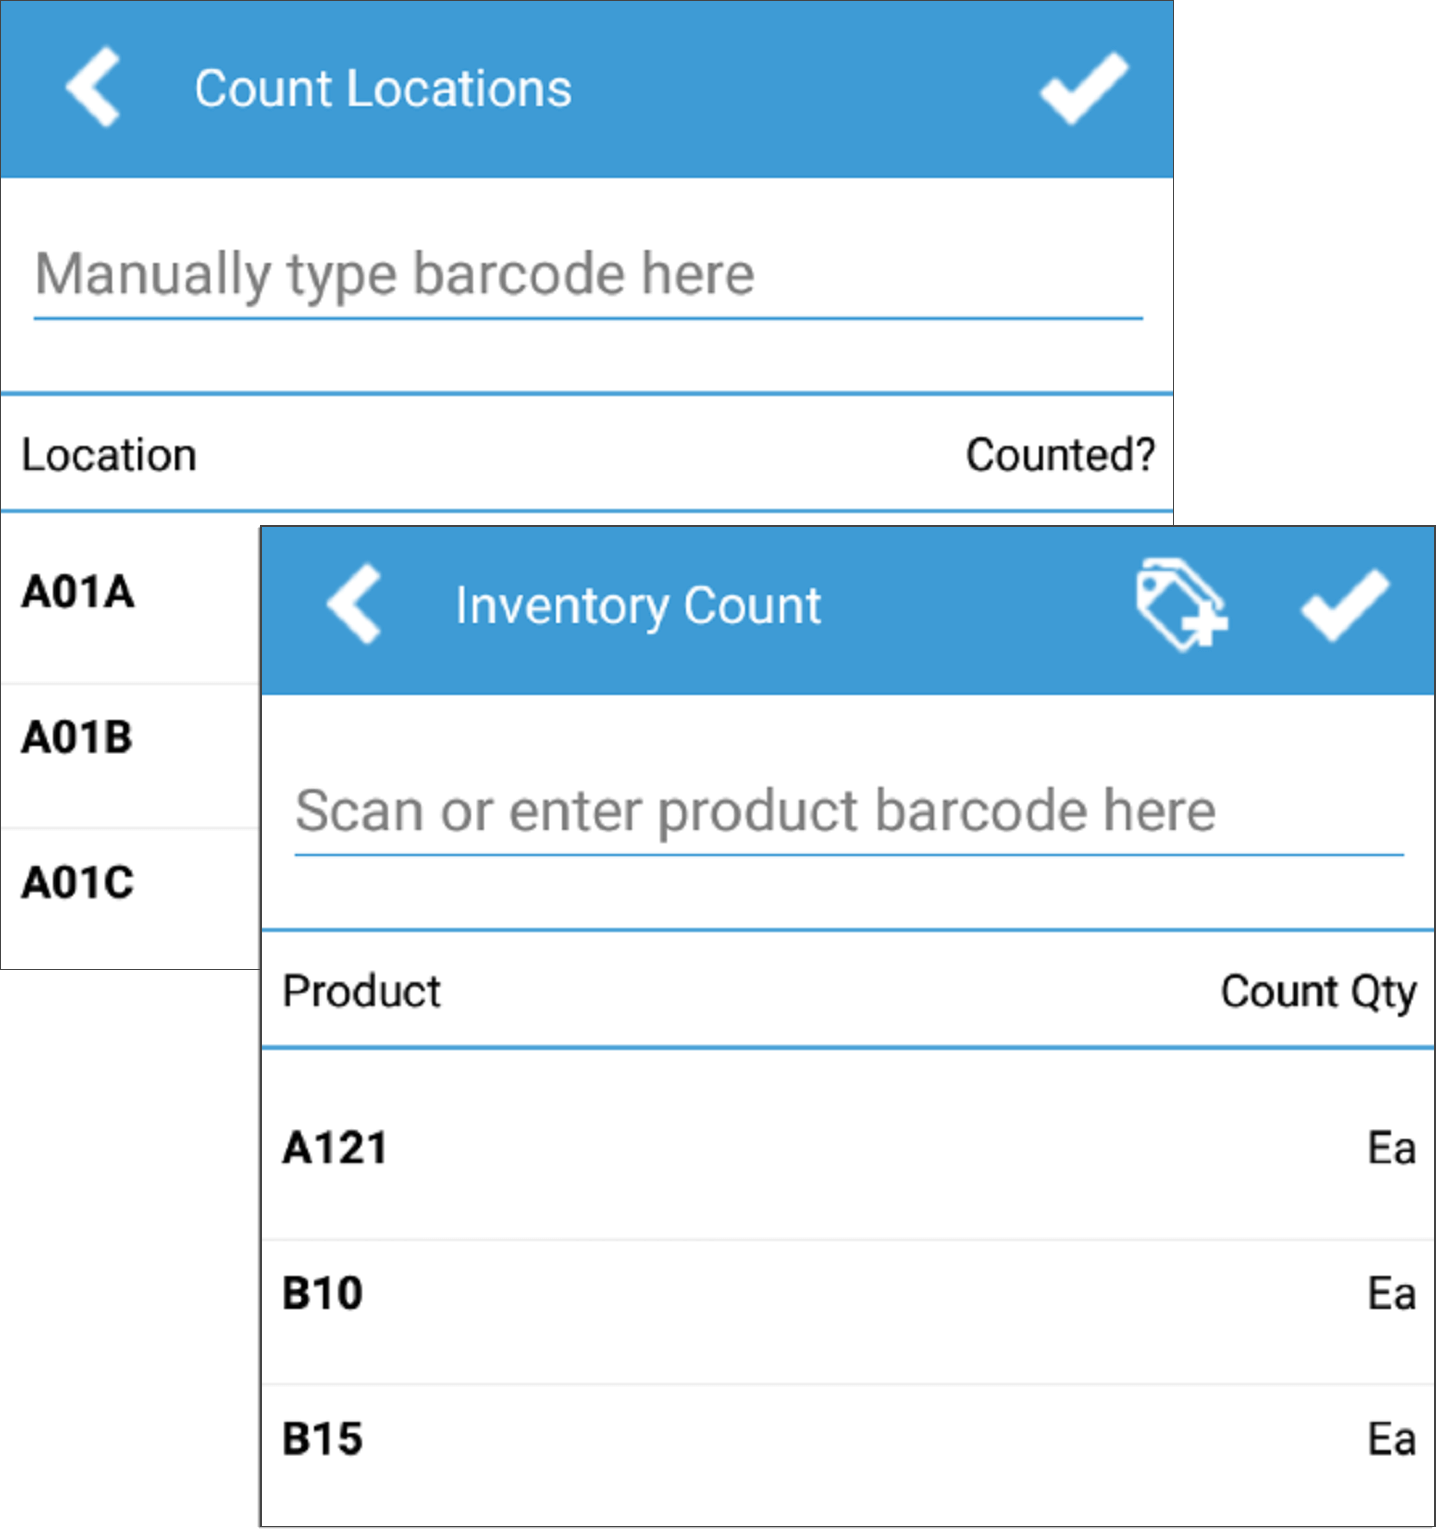
- Depending on the use of bin locations, the next screen will show different information. The next step occurs after selecting the location or product to be counted:
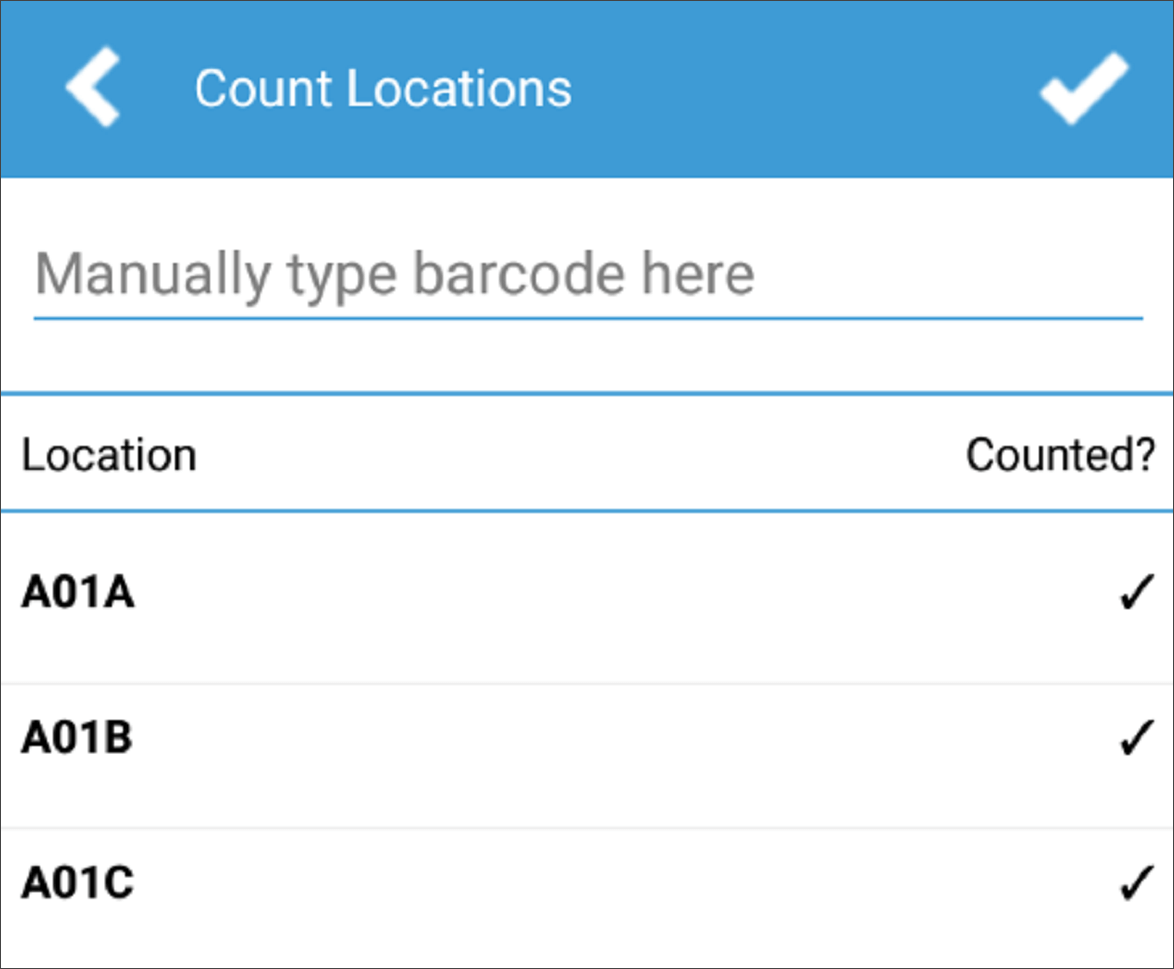
- Android: If locations are enabled, you’ll see the list of locations on the selected sheet with a column named Counted?. Select a location or scan to open the list of products to be counted within. Without locations, a list of products is shown with a Count Qty column.
- WM: When utilizing bin locations, the first screen will show any items missing a location to be counted. Without locations, the full list of products will be shown for the selected section.
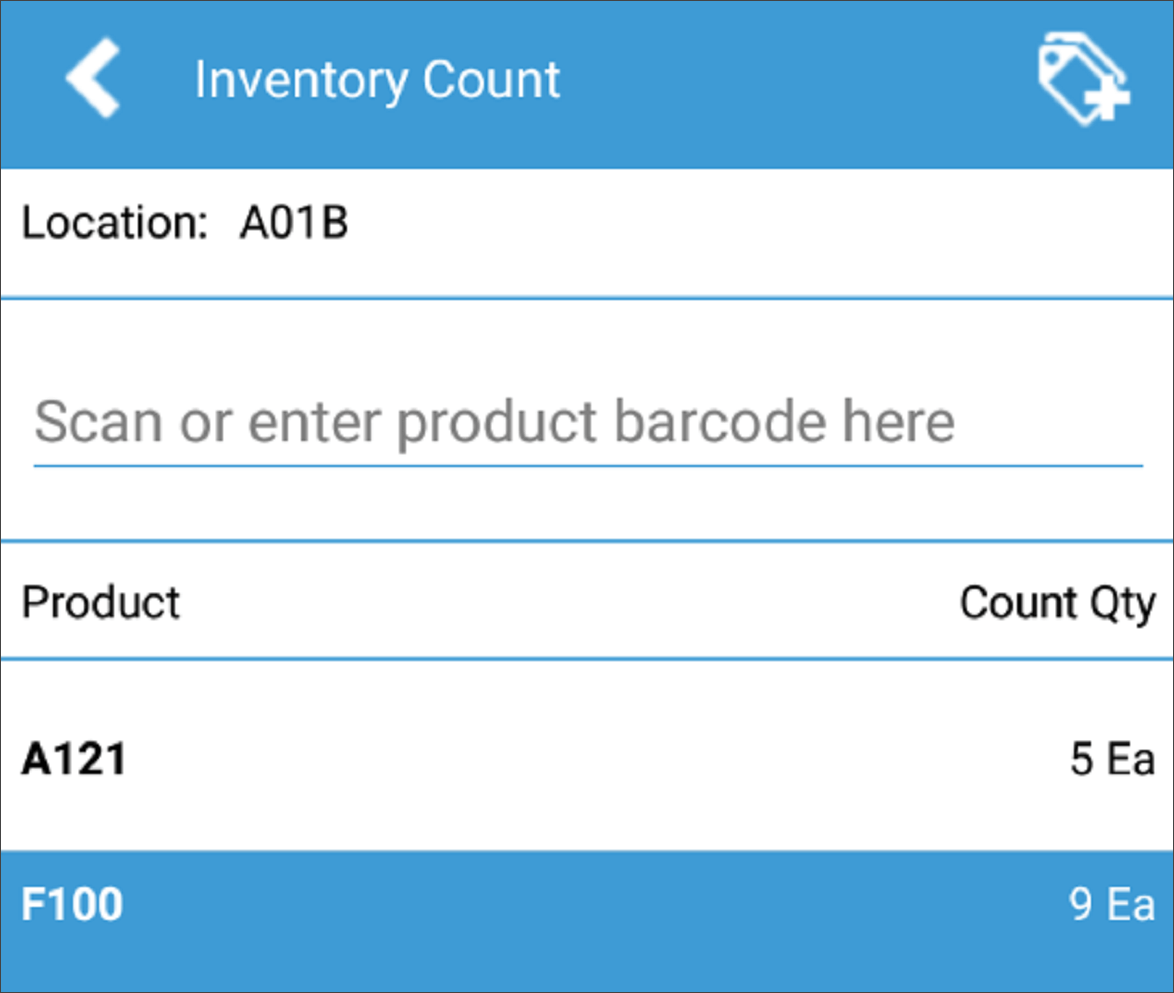
- To count a product, select the location or product in question by scanning a barcode or selecting on screen. Scan a product barcode to increment the quantity by 1 or tap on the product to enter quantity counted. You can use the device keypad or use the arrows (WM) to increment the Qty, as well.
- Once product is counted, move to the next location or product:
- Android: Press check box to accept the Qty counted on the item. Select or scan barcode for next item in list for location. To add products to location, click icon with + in top right corner and repeat until all products counted. If ready to move to next location, press the left arrow at the top of the screen.
- WM: To progress through the locations you’re counting, put cursor in Loc field to scan, enter, or lookup location from the list. Products at current location are shown after selection. Scan or select each product to enter the count Qty.
- Android: Press check box to accept the Qty counted on the item. Select or scan barcode for next item in list for location. To add products to location, click icon with + in top right corner and repeat until all products counted. If ready to move to next location, press the left arrow at the top of the screen.
- If you scan a product that is lot or serial numbered, the lot/serial screen will open:
- Android: Select or scan the lot/serial barcode to enter Qty counted. Continue doing this until all lots counted for product (in total or for location). To add another lot/serial number, click the #+ icon in the top right corner of the screen. When finished, click left arrow in top left corner to go back to the location/product list.

- WM: When not using barcodes, click the # button to open this screen. Here you can scan a lot or serial barcode or use the touch screen to select. Click the green checkmark in the upper left-hand corner to return to the previous screen.
- Android: Select or scan the lot/serial barcode to enter Qty counted. Continue doing this until all lots counted for product (in total or for location). To add another lot/serial number, click the #+ icon in the top right corner of the screen. When finished, click left arrow in top left corner to go back to the location/product list.
- Repeat the process in steps 4-6 for each product listed on the count sheet until all necessary products are counted.
- When finished, select the check mark in the top of the screen.
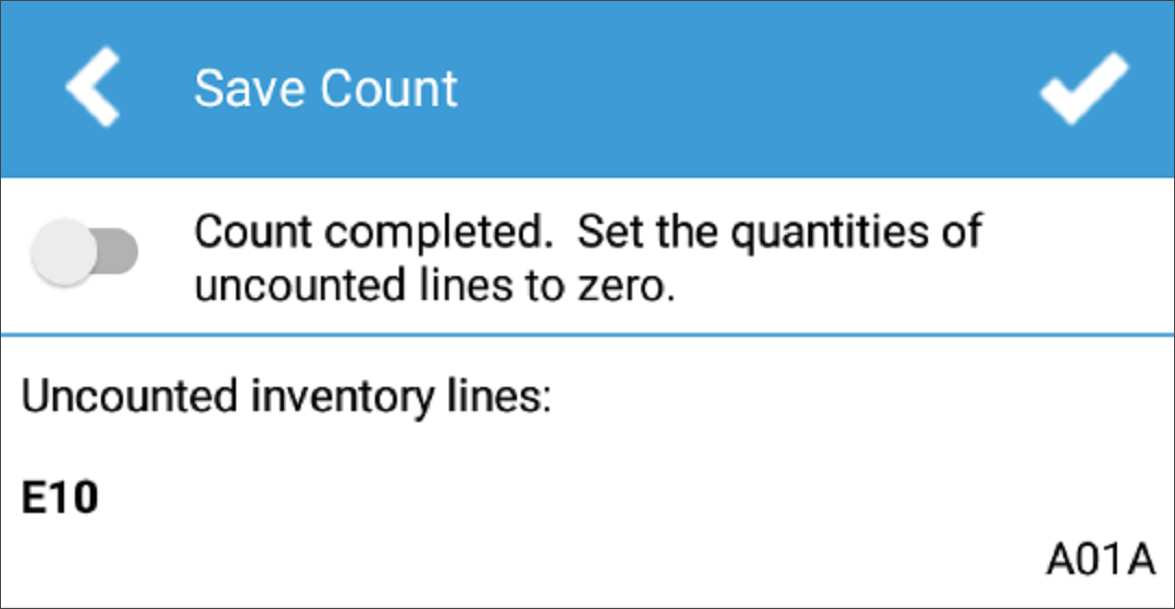
- The Save Count Sheet? screen opens with the option to complete the count and set the quantities of uncounted lines to zero, as well as a list of said products.
- You’ll see a message stating Inventory count saved. Click the check box to go back to the Inventory Count sheet selection screen.
- Open the Enter Count window on the desktop app to review and post entered count quantities.

