Pick List Process


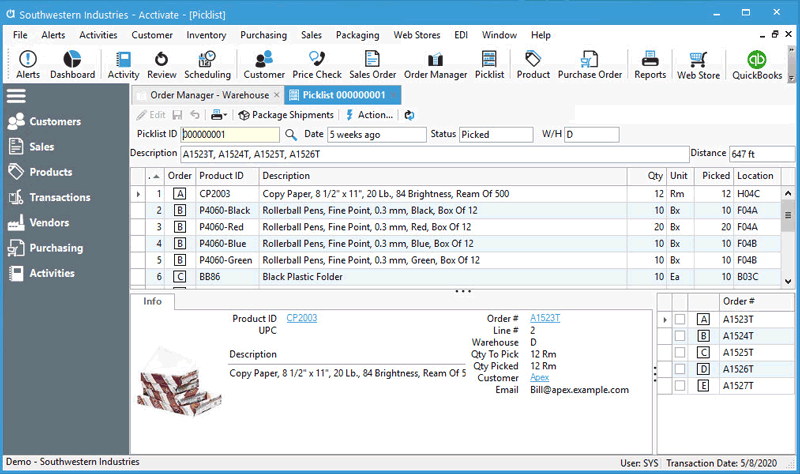
Acctivate’s Multiple Locations module allows for the use of Pick List in the order fulfillment process. This is a picking document which can include multiple Sales Orders to be picked and sequences the pick in a logical order based on the layout of your bins / locations.
In the Enter Sales Order window, the Next Action Button will display the suggested next action for a Sales Order. If you have Pick List enabled in the Sales Orders section of the Configuration Manager, the Next Action Button will display Pick List, then the next suggested action in processing this sales order would be to create it.
There are required configuration options which need to be enabled prior to using Pick List. For a full overview of setup and use, check out this page. The below steps assume all prerequisites are complete.

Create a Pick List for Individual Sales Order
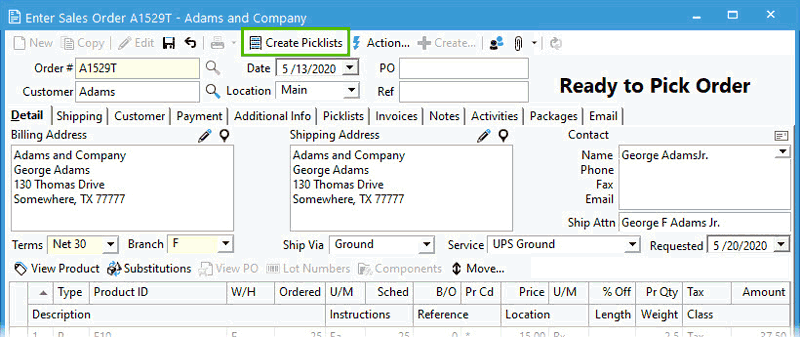
- Open the Enter Sales Order window.
- Click the Create Pick List action button.
- A Pick List for each warehouse will be created. When prompted if you want to Open Pick List, click Yes or No.

Create a Pick List from Order Manager

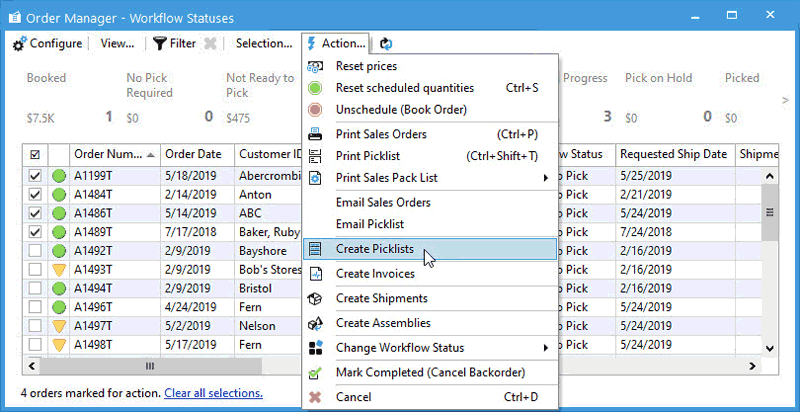
- Open Order Manager.
- Click View > Workflow Statuses.
- Click on the Ready to Pick button.
- Check off one or more orders you would like to include in a single Pick List.
- Go to Action > Create Pick List.
- You will be asked if you want to “Group orders into one Pick List per warehouse?”.
- Yes: One Pick List will be created per warehouse on the order(s).
- No: One Pick List per order selected will be created.
- Next, you will be asked if you want to open the Pick List (or the first Pick List if there are multiple generated). Choose Yes or No.
Whether the Pick List includes one or multiple orders, it will sequence the Pick List and assign the location you should pick from so that the location you pick from and the Picking route is the most efficient possible. If you do not want Acctivate to assign which location you are to pick from, you can set the location on the order detail line prior to creating the Pick List.
After creating a Pick List, you cannot edit the quantities of Sales Order lines that are it. The Workflow Status of the order will change into Pick Pending. This indicates that a Pick List has been created, however it has not been printed or edited yet.

Print a Pick List
Once you’ve created a Pick List, any orders included on it will have a Sales Order Workflow status of Pick Pending Order. The Pick List itself will have a workflow status of Ready to Pick, indicating that the picking process has not begun for this Pick List. Similar to the Sales Order window, the Pick List has a Next Action Button which will drive the picker to the next step in the Process.
Print a Pick List from the Pick List Window
- Click the Pick List icon on the toolbar (or go to Sales> Pick List).
- Click the Next Action Button that reads Print Pick List.

This will generate a Pick List which can be printed out and it will also change its status to In Progress.
Print Pick List from Enter Order Window
You can also print a Pick List from an order. Printing from an order will print the full Pick List, which may include lines from other sales orders.
- Open the Enter Sales Order window for an order that is in the Pick Pending status.
- Click on the Pick List tab.
- Click the Print Pick List action button.

Complete a Pick List
Once the Pick List has been picked, you can enter (or change if you have the Pick in Full configuration option enabled) the Picked quantities and complete it. When you complete a Pick List, the related sales orders will update so that the Sched quantity on the Sales Order matches what was picked. The quantities that were not picked will go on backorder.
Complete a Pick List from the Pick List window.
- Click the Pick List icon on the toolbar (or go to Sales> Pick List).
- Use the Pick List ID lookup to find and select your Pick List.
- If you need to update the Picked qty, click Edit.
- In the Picked field, enter or change the quantity picked.
- Click Save.
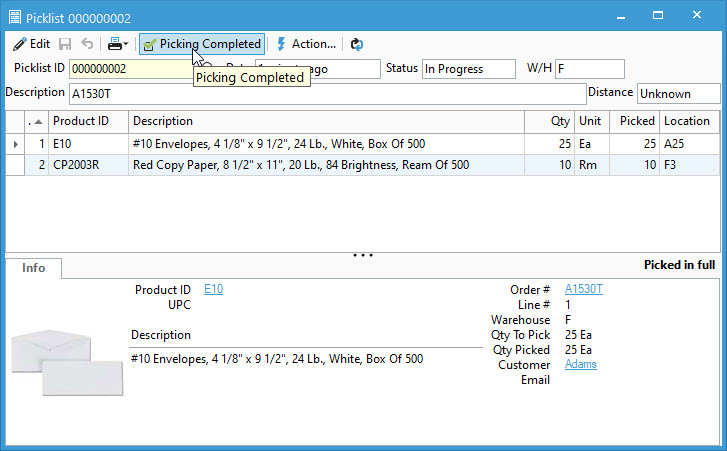
- Click the Next Action Button that reads Picking Completed.
- You will be asked if you want to complete the Pick List. Click Yes.
Once it has been Completed, its Status changes to Picked. Likewise, the related Sales Orders also go into a Picked status.


