Creating Batch Invoices


Once an order has been picked, packed, and shipped, the final step is to create invoices. Creating invoices is an important step in order processing as it records important financial details and removes the shipped inventory from your On Hand quantity.
For information on creating invoices from an individual order, click here.
Select Orders to Invoice
- Open Order Manager.
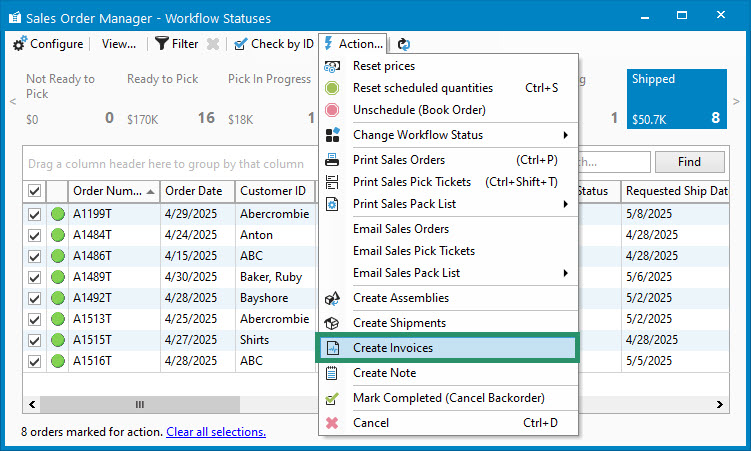
- Locate the orders ready to be Invoiced. These typically have a workflow status of Picked or Shipped.
- Check Off the Sales Orders you want to invoice.
- Go to Action > Create Invoices.

Create Invoices Window
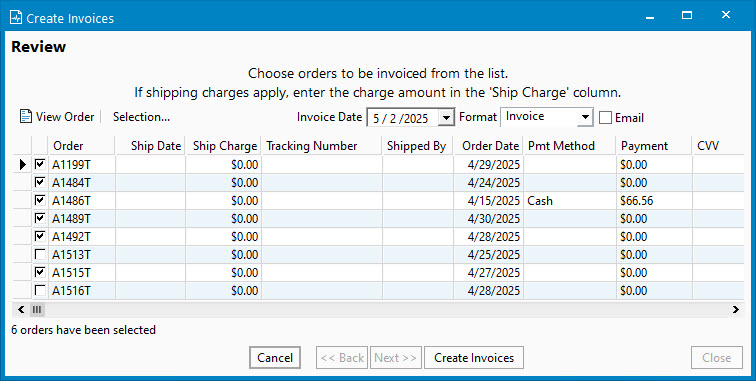
The Create Invoices window displays all the sales orders you selected in the previous step. At the top of this window, you’ll see several fields you can update before creating the Invoice:
- Invoice Date: This is the date the inventory will be removed from stock and customer receivable recorded.
- Invoice Format: If multiple invoice formats exist, choose the one you wish to use for this batch of invoices. This selection is saved for use when printing the invoice in the future.
- Email: Check this box if you want the invoices to be emailed to customers using an Invoice Email Template.
- Charge CC: This option is available if you are using an integrated credit card processor. When selected, the credit card on the order will be charged when invoice is created.
If any orders are unchecked, they will not have an invoice created because they have a Credit restriction. If you check the box to the left you will receive a message about the current credit status for that order and you will be asked if you want to override the status to which you can say yes or no.
Below these settings, the grid allows you to review and edit certain invoice details for each order before creating them. You can update the Ship Date, enter a Ship Charge, add a Tracking Number, record who the order was Shipped By, enter a Payment Amount (if a payment method is already selected), and confirm or update the Contact Email.

Create Invoices and Handle Any Errors
Once you’ve reviewed your invoice settings and made any necessary updates to the grid, click Create Invoices to begin the batch process.
If you had the Email option enabled, the email window will appear. It will include invoices for any sales order with an email address entered. You can use the arrows at the top of the window to navigate between messages. All emails sent through this process will use the same invoice format you selected earlier.
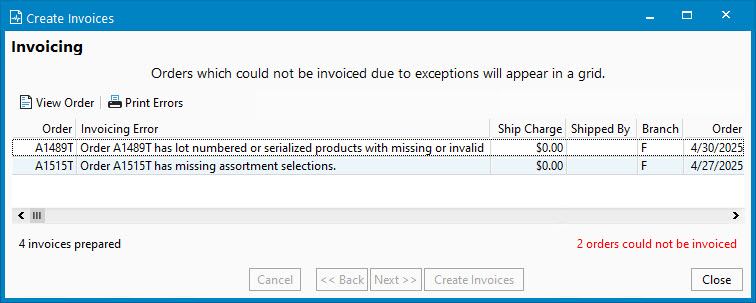
If any invoices could not be created, Acctivate will display a list of affected sales orders. This typically happens when required information is missing, such as a lot or serial number for a tracked product. From the error screen, you can:
- Click View Order to open the sales order and resolve the issue
- Click Print Errors to print a report of the failed invoices

After reviewing or resolving any errors, you can close the window to finish the process.


