Create New Customer


Acctivate users can add a customer from a multitude of places, such as the customer list, edit customer, sales quote, sales order, and business activity window. Customers are one of the lists which sync both ways between QuickBooks and Acctivate. Whenever entering in QuickBooks, the synchronization process brings the main customer information into Acctivate.
Be sure to enter in one or the other and not add separately into both. We recommend creating customers in Acctivate due to the additional fields available (i.e., branch, multiple ship to locations, pricing, or customer contacts). To create/update customers in bulk via import, follow the instructions here.
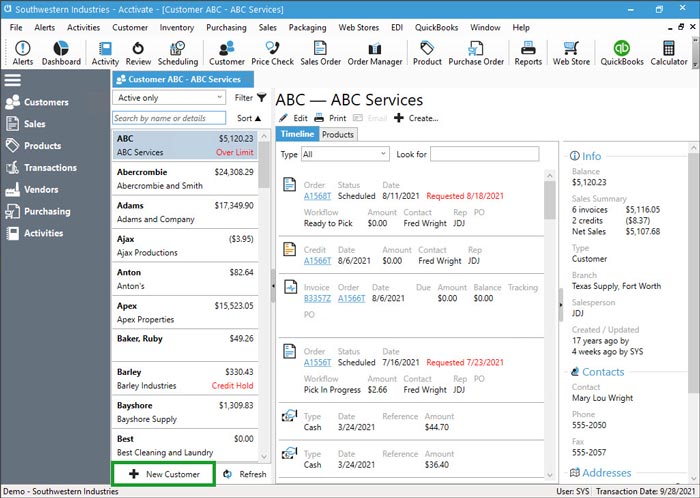
Create New Customer from Customer List
- Select Customers via the left navigation menu.
- Click + New Customer or Ctrl+N at the bottom of the list.
- The Edit Customer window opens for the user to enter details.

Create New Customer from Edit Customer Window

- Navigate to Customer > Edit Customer or click Customer icon on icon bar.
- Click New or Ctrl+N.
- The Edit Customer window opens for the user to enter details.
Create New Customer from Sales Quote or Order Window

- Create New Sales Quote or Order.
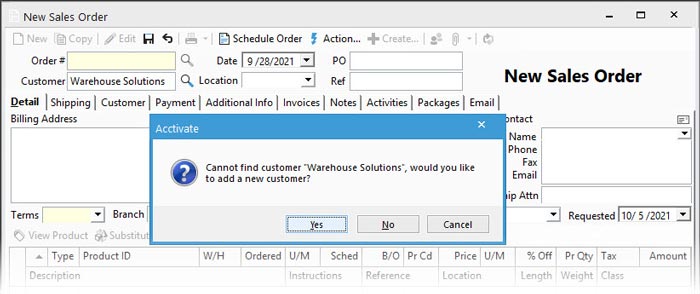
- Search for the customer in the look up window. If customer doesn’t exist in database, close the look up and enter the Customer name followed by pressing the Tab key. The user will be prompted to create new customer.
- Click Yes.
- The value entered will be shown to the user for approval or modification before creating the new Customer ID. Click Ok.
- Customer information entered prior to saving sales quote/order will be added to the new customer record. This includes billing address, shipping address, terms, branch, sales rep, contact information, and marketing code.
- To add more details, click the customer icon on the quote/order.
- Click Edit on the Edit Customer window after it opens.
Convert Other Contact Information to Customer from Business Activity

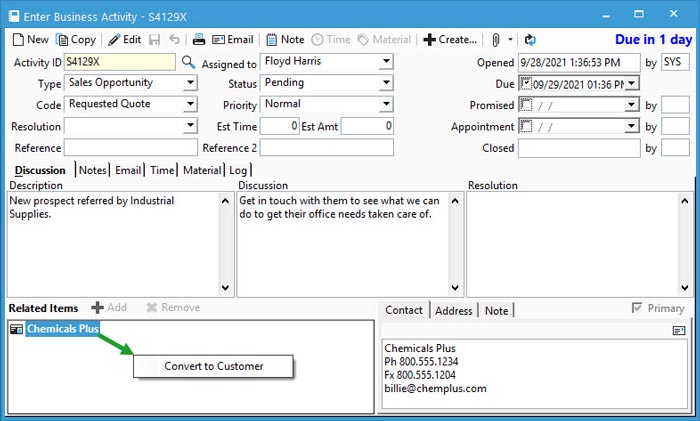
- Add an Other Contact as a Related Item on the Business Activity.
- When ready to convert to a customer record, right click on the related item > Convert to Customer.
- To add more details, double click on the new Customer listed as a Related Item.
- Click Edit on the Edit Customer window after it opens.
The full list of available fields for customer information is found here. We also have a training page which is an overview of the Edit Customer window. Make sure to add any additional ship to addresses and/or customer contacts, as well as customer credit information.


