Inventory Transfer

In this article

Full training library
It is sometimes necessary to transfer inventory between multiple locations, in multiple warehouses or between multiple locations within a single warehouse. This is in processed the Enter Transfers window and can be reviewed within the Transactions List.
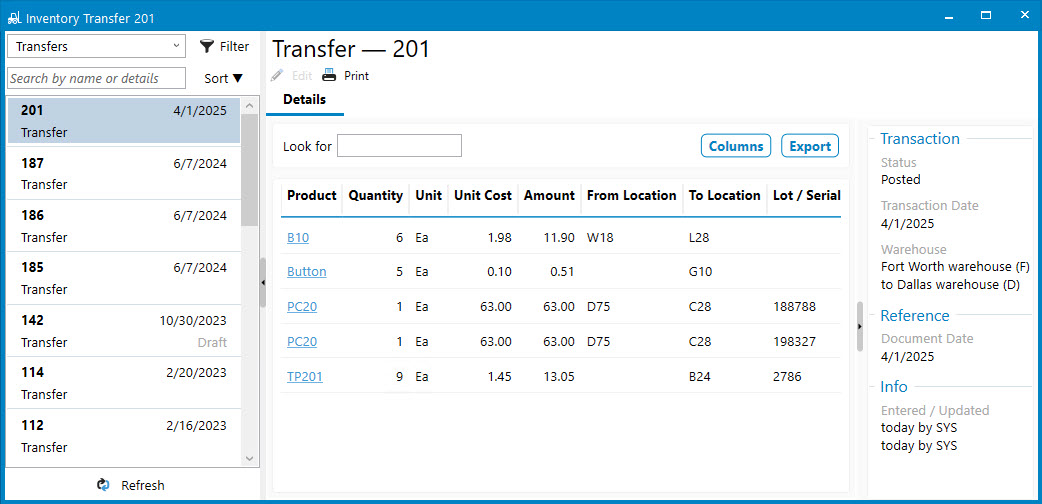
Review Inventory Transfers
- Choose the Transactions list from the left navigation bar.
- Search for and locate the session or transaction types in question.
- Select session for review.
- Sessions saved, but not posted will show Draft on the list, as well as a watermark on the read only window for the transaction. These can be modified before posting by clicking the Edit button.
- Skip to next section step 5 when clicking Edit from the list window.
- Posted sessions will show more information, such as unit cost and amount adjusted.

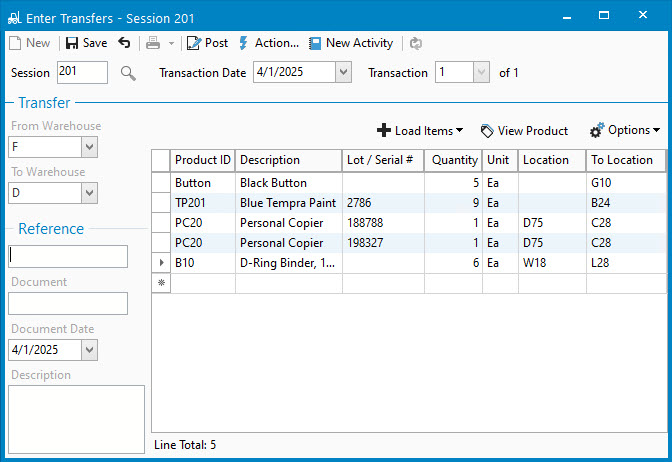
Create and Post on Enter Transfers Window
- To start a new inventory transfer, go to Inventory > Enter Transfers.
- Click New (Ctrl-N) to start a new session.
- Set the Transaction Date which is the date the transfer will be posted into inventory.
- Select the From Warehouse and To Warehouse.
- Inter warehouse transfers between bin locations utilize the same From and To Warehouse. The remaining steps are the same.
- Add the product(s) being transferred and the quantity you want to move:
- Manually add to the session by entering Product ID followed by tab key, scanning a barcode, or selecting from the lookup window.
- Bulk add items by selecting +Load Items button to choose what other transaction details to use for this transaction. The options are Inventory Receipt, Inventory Transfer, or Inventory Assembly.
- Enter Quantity being transferred.
- If utilizing Lot / Serial Numbers, select the Lot / Serial # being transferred.
- If utilizing Bin Locations, specify the Location and To Location on each row.
- When requiring bin locations on all transactions, use this to move out of blank bins into named locations. To do so, leave the Location blank with the To Location selected.
- Save the session once all details added.
- Optional step to print the Inventory Transfer form. This is treated like a pick ticket in the warehouse. It tells the users what to pull with the addresses of both warehouses listed in the header.
- Click Post to move quantity between warehouses.
- Once posted, users with proper access will be prompted to Preview, Print, or Cancel report printing. This report can be accessed at any time through the Transaction List and Inventory Reports.


