Synchronizing with QuickBooks


Acctivate seamlessly synchronizes with QuickBooks, providing a comprehensive business management solution. Depending on your QuickBooks version, the synchronization process may vary: desktop companies sync data through a user initiated synchronization from within Acctivate, while online companies automatically synchronize data as it’s modified. Since Acctivate relies on certain lists being maintained in QuickBooks, it’s essential to review the full summary of list interactions between QuickBooks and Acctivate here.
For users with access to the Acctivate Demo company, please refer to our guide on setting up synchronization with demo data. Note that synchronization is unavailable in our hosted evaluation environment.

Synchronize with QuickBooks Desktop
The synchronization process between Acctivate and QuickBooks desktop is manually initiated from within Acctivate. In the model and live Acctivate databases, users with QuickBooks installed on their desktop will be able to run the synchronization process. To remove the ability to sync, simply do not install QuickBooks on the user’s desktop.
You can set up this integration to run in the background (without opening QuickBooks), only when logged into the QuickBooks company, or to prompt the QuickBooks user each time. For ease of use, model companies are typically set to sync without opening QuickBooks.
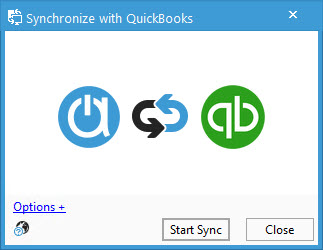
- From the QuickBooks menu on the Acctivate title bar, choose Synchronize with QuickBooks.
- Click Start Sync to begin the sync process.
- The next window displays the synchronization progress, starting with connecting to the QuickBooks file. If the file isn’t open on your desktop, this step may take a few seconds.
- You should see all rows marked with a green check:
- ✅ : Sync successful
- ❌: Error occurred which needs to be resolved to ensure future syncs are successful.
- ⚠️: Warning
- 🚫 : Current QuickBooks user lacks permission to sync this table.
- You should see all rows marked with a green check:
- Once the sync completes, you can choose to View Log or Close.
Synchronize with QuickBooks Online
The QuickBooks Online sync occurs as certain tasks are performed, such as posting inventory transactions, creating invoices, and using certain look ups. Additionally, one workstation will automatically sync every five minutes to ensure communication between both systems stays up to date. If this workstation logs off or goes idle, the sync moves to the next available computer. The assigned user will see a small icon in the bottom right corner of Acctivate showing a clean sync, warnings, or errors. To run a manual sync with QuickBooks Online, follow the same steps listed for Desktop.
Note: Most QuickBooks Online model companies are created using a one-time sync process with your production company. This sync pulls the lists maintained in QuickBooks but does not affect inventory levels. Once you go live, we set up a bi-directional sync with the same production company, which does affect inventory. Consult your onboarding representative to discuss different options.
Initial Inventory
Once integrated with QuickBooks, Acctivate takes complete responsibility for all inventory transactions and interacts with all QuickBooks lists. Afterwards, inventory products and quantities are not synced to or from QuickBooks. Instead, you’ll see summary journal entries utilizing the Warehouse GL accounts for posted transactions based on transaction type and date.
During the initial connection between Acctivate and QuickBooks, you have the option to import all active items into Acctivate, including their quantities and values. This process will mark all items as inactive in QuickBooks and adjust their quantities to zero. Acctivate then generates the corresponding product list and initial balances, offsetting the adjustments in QuickBooks. If you’re not using items in QuickBooks, we can import the list and their balances from a spreadsheet.


