Vendor Returns

In this article

Full training library
Whether the vendor sends too much product, items arrive damaged, or any of the other reasons for a vendor return, the process to send it back to the supplier includes the following steps:
- Create a Purchase Order for Vendor with negative quantities.
- Receive the negative quantities.
- Invoice the negative amount.
During the next synchronization after creation of the bill, you’ll see a vendor credit in QuickBooks.
Create a Negative Purchase Order
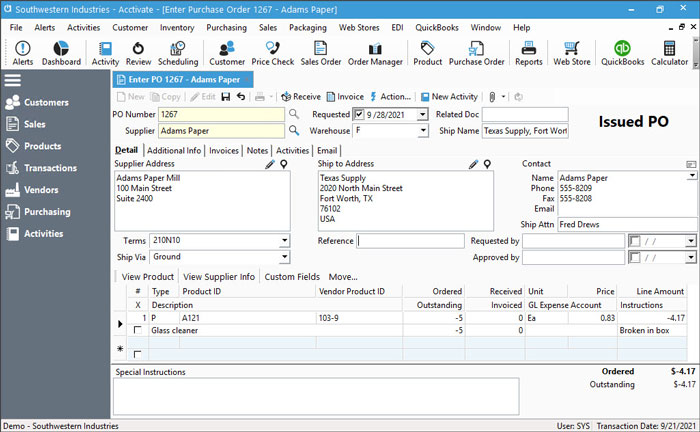
- Create new PO for the vendor in question.
- Select the Warehouse the product is currently stocked in.
- Click in the Product ID field and either type the item ID manually followed by pressing the tab key or lookup the item in the search window.
- Products being returned are removed from stock by utilizing a negative Ordered quantity. If you’re creating a mixed PO of the items being sent back and ordering more, the ones you need to purchase would be positive quantities.
- Verify the Price.
- Add any special notes on the line via the Instructions when necessary.
- Repeat steps 3-6 for each new product until all items listed.
- Save or use the shortcut CTRL+S.

Remove Products from Warehouse
Upon shipment to the vendor, you’ll need to remove the items from inventory. This is done via the Inventory Receipt transaction from the negative purchase order.
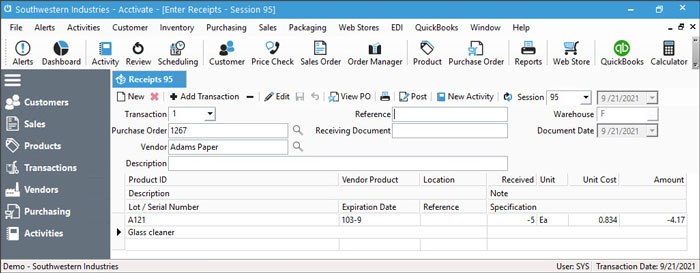
- Create an Inventory Receipt session from the PO or the Inventory menu.
- The Warehouse field will automatically populate based on the warehouse selected in the PO. This should be the warehouse the product currently resides.
- Depending on your Purchasing Options, the product information will either populate or you will need to add manually to the transaction.
- The Received quantity populates based on the outstanding quantity on the PO. For a return, this would be negative with a positive unit cost and negative line amount. Verify that the unit cost is the same as the original receipt.
- When finished, click the Post button.
- Click Yes on the prompt received to post the change in inventory.
- The user has the option to print, preview, or not print (cancel) the report.

Create Vendor Credit
After receiving the physical (or emailed) vendor credit, creating the purchase invoice from the purchase order completes the process.
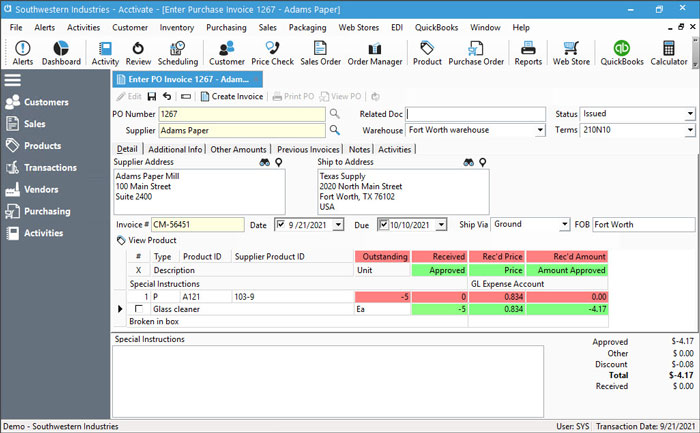
- Create the Purchase Invoice from the PO.
- Enter the Credit Memo number in the Invoice # field.
- Select the Date of the credit.
- Verify the Approved quantity, Price, and Amount Approved. These need to match the lines on the invoice received from the supplier.
- When all info entered and the Total matches the invoice, click Create Invoice.
- If invoicing all lines on the PO, the user will be prompted to mark the PO as Completed. Choose Yes to complete.


