Void Inventory Sessions


With the proper user permissions, Acctivate users can void inventory transactions posted incorrectly to be reposted with the correct information, as part of Acctivate’s inventory control functionality.
This prompts recalculation of unit costs for transactions effected by this change, as well as quantity on hand and any journal entries related to it.
It is important to consider voiding posted inventory transactions an administrative tool. Once voided, it is not possible to re-post the transaction. Users would need to recreate a new session to undo a void.
When voiding a session which creates a lot/serial number, make sure to verify what transactions utilize this lot/serial number. Track and Trace can be utilized for this purpose prior to voiding. If the lot or serial numbers were transferred, used in an assembly as a component, or sold to a customer on a sales invoice, be sure to either recreate the same lot/serial number used originally or void any transaction which utilized it to be recreated with the proper lot/serial number selected.

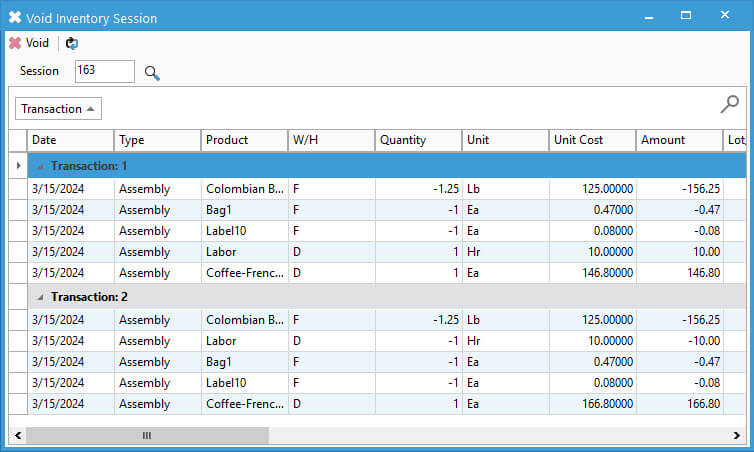
Void Inventory Session
- Go to Inventory > Void Inventory Session.
- Type the Session number into the Session field or use the lookup to select from a list.
- Review all details related to this session.
- Click Void when ready to void session.
- Choose Yes on the prompt to complete the process.
- Click OK.
Review Voided Inventory Sessions
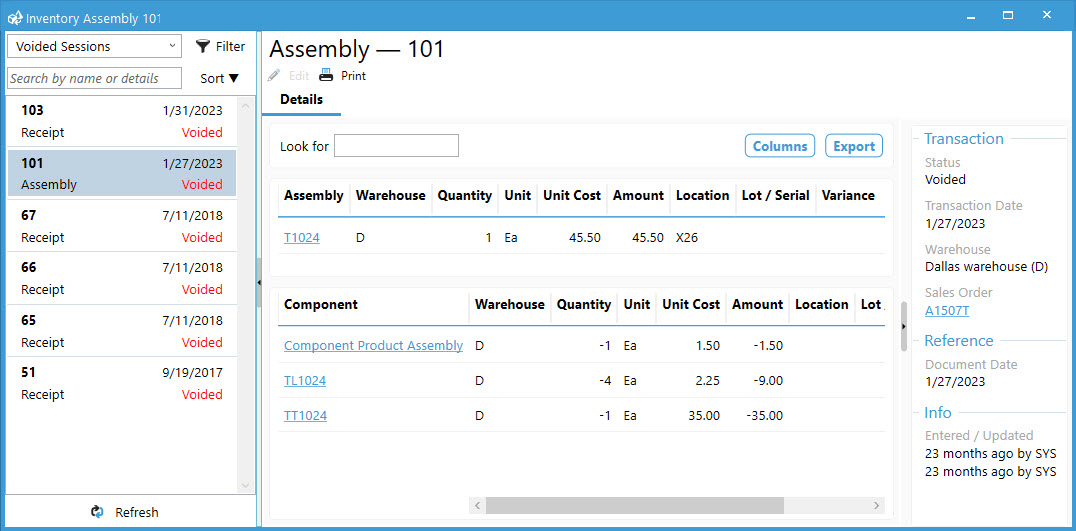
Depending on what you’re wanting to review, there are two options: create a custom filter in the transaction list to review each session; run a report to show details for all voided sessions within the selected filters.
Transactions List Filter
- Select the Transactions list from the left navigation menu.
- Click the arrow next to the currently selected filter to make sure you don’t already have one in the list.
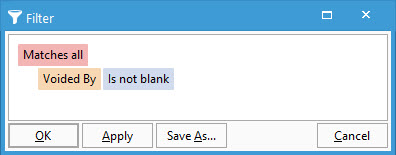
- Select Custom filter… to create a new filter with the following details:

- Choose Save As option to name the filter and choose to make available to other users. This adds the filter to your list of available filters on this list window.

Reports Menu
- Navigate to the Inventory Reports
- Inventory > Inventory Management Reports.
- Click Reports icon > expand Inventory Management.
- Expand Transactions.
- Select Voided Inventory Transactions.
- Choose any necessary filters.
- Preview or Print
- Previewing allows the users to print, export, email, or open the report in a specific format.
- Print sends the report to your default printer or the one assigned in configuration management.


