Inventory Count


Inventory counts in Acctivate help you verify that your actual on-hand quantities match what’s recorded in the system. Whether due to shrinkage, misplacement, data entry errors, or timing issues with transactions, periodic counts help ensure inventory accuracy and support informed purchasing and operational decisions.
The inventory count process is structured to minimize disruptions and provide flexibility depending on your workflow. You’ll start by creating a count sheet on the desktop application, which can then be printed for manual entry or accessed using Acctivate Mobile to record the actual counts in the warehouse. Acctivate tracks which products were included in the count and automatically adjusts inventory based on the difference between the recorded quantity and the actual count.
Most companies perform full inventory counts monthly or quarterly, while other use cycle counts to spot-check specific product groups on a rotating schedule. Regardless of approach, consistent counting helps you maintain clean inventory records and catch issues early.
This process includes two primary steps:
- Creating the Count Sheet
- Performing and Entering the Inventory Count
Considerations Before Beginning Count
The count sheet takes a snapshot of inventory levels at the moment it’s created. If transactions like receipts or invoices are entered afterward, they won’t be included in that snapshot. This can cause confusion or inaccurate variances when the count is posted.
Tips for a Smooth Inventory Count:
- Pause warehouse activity during the count if possible, especially for full physical inventories.
- Complete and post all inventory-affecting transactions such as PO receipts, transfers, sales invoices, assemblies, and adjustments.
- Mark incoming shipments as do not count for any vendor receipts coming in while count is occurring.
- Include total quantity prior to picking products for a customer shipment.
- Communicate the count plan with your warehouse staff. Make sure everyone understands who will count, when, and how the data will be entered.
Best practice is to create the count sheet the day of the physical count to reflect the most up-to-date quantities. If creating before the scheduled count to print the sheets, use the Action menu on the Enter Counts window to Delete Session and recreate it the day you’re counting products
Creating the Count Sheet
The count sheet defines the scope of the count and freezes the inventory quantities at a point in time. To begin the count process:
- From the title menu, choose Inventory > Enter Count
- Click New to open the Create Count Sheet window
- In the Select for count section, specify:
- Warehouse: The warehouse for which the count sheet is being created.
- Product Class: Select a specific Product Class or choose All.
- Count Cycle: If applicable, enter the count cycle to include specific groups of products.
- To choose sort order on the sheet, select the proper Sequence in the Count Sheet Organization section:
- Product ID
- Description
- Location, Product ID
- Location, Description
- Product Class, Product ID
- Product Class, Description
- In the Warehouse Locations section, decide whether to Include Empty Warehouse Locations:
- Checked: Includes all locations, even if currently holding zero stock.
- Unchecked: Includes only locations with stock on hand.
- Click OK to proceed.
A warning will prompt:
BEFORE you prepare count sheets, you MUST:
- Stop all movement of the stock to be counted.
- Post all inventory transactions.
- Invoice all shipped orders.
Has this been done?
Click Yes to continue. Acctivate will generate the count sheet session, freezing and recording the current on hand quantities in the selected warehouse/group. It’s crucial to halt inventory movement during the count to ensure accuracy.
Once created, the count sheet loads into the Enter Count window. Click the Print icon to print the sheet for manual entry.
Note: A Product and Warehouse combination can exist in only one Count Sheet at a time. For instance, if a Count Sheet for the “Dallas” warehouse includes the product “Widget,” you cannot create another Count Sheet for “Widget” in the “Dallas” warehouse.
Performing and Entering Count
In Acctivate, users have 3 options for counting inventory in their warehouse. They can be manually counted and written on the printed count sheet to be entered on the session, scanned with Acctivate Mobile device, or entered directly into the Enter Count window. The following steps only include information for manual count entry. For details on mobile inventory counts, check out this training page.
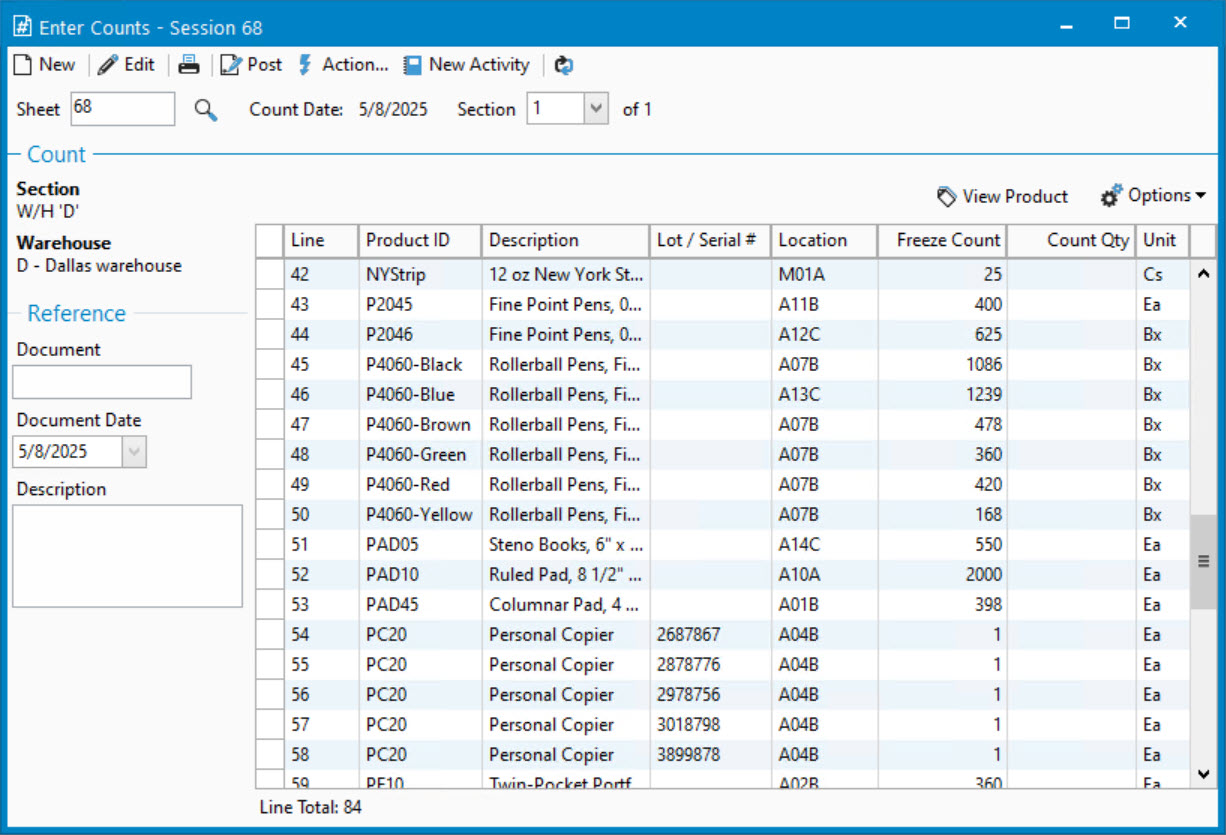
The printed count sheet includes the following information:
- # – Dictates the line number of the product row on the count.
- Product ID – The unique alphanumeric value assigned to the product
- Description – Verbose explanation of what Product ID is to customers and end users.
- Lot/Serial # – Available for lot/serial numbered items. The count breaks each lot or serial number into its own line for the product ID. This way the users can count how many are in each lot or if the serial number still exists in the warehouse.
- Location – When utilizing bin locations, you’ll see this value for any item stocked in a location. Just like lot/serial items, the product ID will repeat down the column for each new bin location with quantity on hand for the item in question.
- Count – Enter the quantity counted in the blank box.
- Unit – This translates to the stocking unit of the item. Alternate purchasing and sales units cannot be used for inventory counts.
To ensure an unbiased count, current on-hand quantities are not displayed. Enter the counted quantities corresponding to the stocking unit. For products with zero on-hand, write “0”; leave blank for products not counted to avoid confusion during data entry.
Entering and Posting the Count
After the physical count is done, gather the count sheets and enter the count numbers into the system or verify numbers entered via mobile devices.
- Go to Inventory > Enter Count.
- Select the appropriate Count Sheet and Section.
- Enter the Count Qty recorded on the count sheets or verify the numbers saved from Acctivate mobile. Enter “0” for items with zero on-hand; leave blank for items not counted.
- When multiple sections exist, choose the next Section in the drop down when finished with the first. Repeat these steps until all sections are counted.
- Once entered quantities are reviewed, click the Post button to post all sections listed on the session.
Upon posting, you’ll receive the following prompt:
Post inventory count session?
All uncounted lines will be deleted resulting in no adjustments being made for them. If you wish to instead record lines as having no quantity remaining, they must have a count quantity of zero.
Choose Yes to post and remove uncounted products, resulting in no change to their count. Choose No to continue editing the count sheet. To set all uncounted lines to zero, use Action > Set Uncounted to Zero.
After posting, Acctivate adjusts inventory based on the variance between the Freeze Count and Count Qty values. Review this adjustment via the Inventory Variance report.

