Move Stock with Acctivate Mobile Inventory Transfers

With Acctivate Mobile Inventory Management, users can scan to transfer inventory from one warehouse and/or bin location to another from a mobile warehouse device. The ability to scan ensures data is entered correctly in the transfer session.
When utilizing bin locations, it’s great to print out barcodes to scan for each location. These labels are stuck on the bins within your warehouse for employees to scan during the transfer, count, receipt , assemble, order picking, pick list picking, and mobile order entry processes. For inventory transfers, the use of Application Identifiers is required for barcode scanning.
Prior to using this module, make sure to review the mobile transfer options in configuration management prior to using this module to specify whether users can post from the device or save sessions to be posted later.
We have two versions of Acctivate Mobile: Android and Windows Mobile (WM). The steps below cover both versions with the slight variations noted.
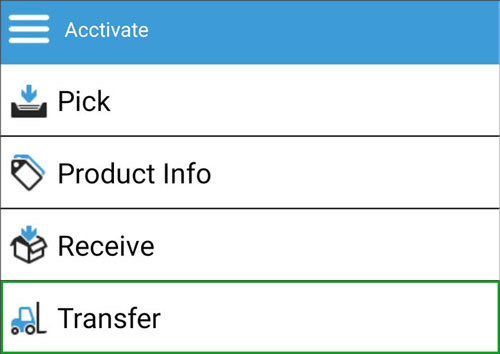
- Navigate to the Inventory Transfers screen:
- Android: Select Transfer from main menu after logging into Acctivate Mobile with the same user as the desktop app.
- Windows Mobile: Click Inventory > Transfer
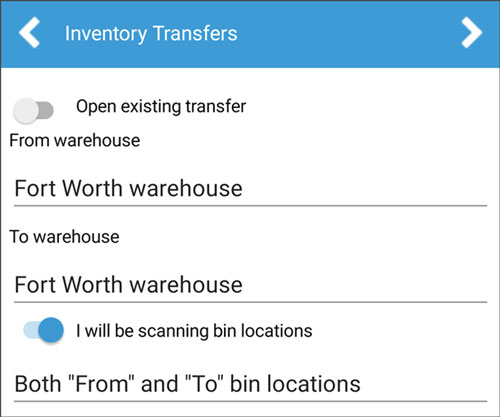
- This opens the Inventory Transfers screen which shows multiple options:
- Open existing transaction: Toggle this option select from a list of open inventory transfer sessions. On Android, this option is hidden when no open transfers exist in the database.
- From Warehouse / To Warehouse: Create a new inventory transfer session with selected warehouses. To create an intra-warehouse transfer, select the same warehouse for both the From and To values.
- Scan bin locations options (Android only): This option effects the ability to scan in each of the location fields. Users can still type or select from a list of locations on the transaction. This functionality exists in WM when entering qty being transferred by clicking on the barcode icons.
- “From” bin locations only
- “To” bin locations only
- Both “From” and “To” bin locations (default)
- Press the right arrow to move forward to next screen.
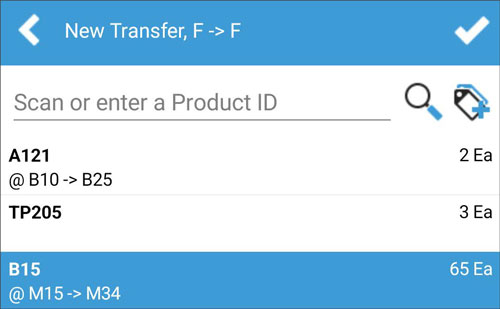
- Add the product(s) needing to be transferred. This action is performed by scanning a product barcode, manually entering the ID in the Product field, or using the lookup to search for and select from a list.
- For non-lot/serial items, specify the Qty being transferred by scanning or entering a value. On Windows Mobile, you have the additional option of using the up and down arrows next to field.
- When transferring a lot or serial numbered item, select the # button next to Qty field. The next screen will allow the user to scan, look up, or enter the lot/serial number, as well as the qty and/or bin location per number.
- Android: After entering lot/serial and bin locations on Android, click check box to go back to the product selection screen. If transferring multiple lot/serial numbers or the same one into different locations, continue the same process of adding a new lot followed by clicking the check box until all are added.
- Windows Mobile: After entering lot/serial number details for one number, hit Enter key to select next lot/serial number. When done selecting all details for lot/serial number and the respective locations, press the check box to return to the previous page and move to the next item.
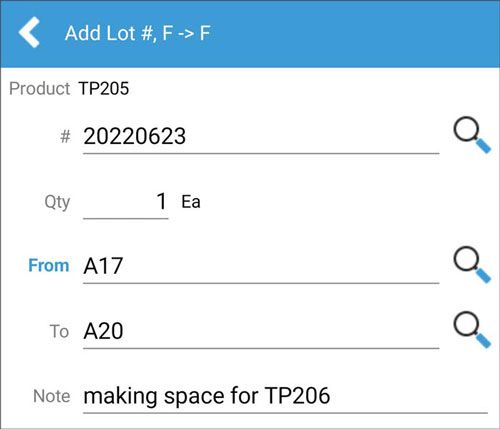
- If using bin locations, you have the option to scan, lookup, or manually enter the From and To locations. Toggle the barcode button to turn scanning capabilities on or off in Windows Mobile.
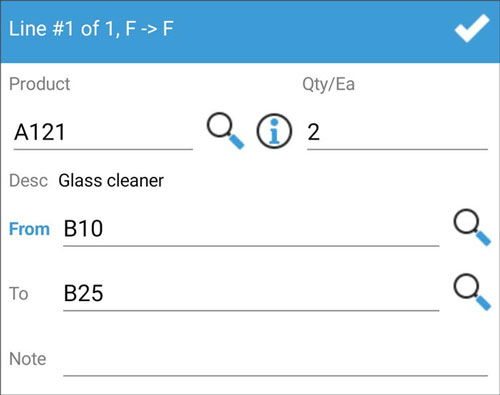
- Repeat steps 4-7 until all products are loaded.
- Press the check mark at the of the screen.
- The last screen gives the user the option to Save and/or Post the transfer session. This does require an option to be checked in configuration management. Click check at top left-hand corner to submit or post.

- A message shows on screen telling the user what session number was saved or posted. Saved sessions can be accessed another time on the mobile device or the desktop app.
- Android goes back to the main Inventory Transfer screen. On WM, select the green check in top left-hand corner to complete transaction and go back to Inventory Transfers screen.


